

Discovery of the M31 [OIII] emission arc
Recently, a major discovery by an international team of amateur astronomers and scientists has become a huge online hit, and this new discovery is just located in one of the
ASIDeepStack is a deep sky stacking software (only supports 16-bit fits files for now). It offers many capabilities, including image preview, stack, histogram stretching and much more. It can process various types of files such as lights, darks, flats, bias, etc. and accordingly, after stack it will also improve the image signal-to-noise ratio (SNR).


Area A: Setting Bar. Including settings and help.
Area B: File List Area. Including Bias, Flat, Dark, Light four tabs, empty current tab button and so on.
Area C: Stack Area. Including open save path, start stacking, and switch single/stacked display.
Area D: Histogram Setting Area
Area E: Full-screen Button
Area F: Vertical Tool Bar
Area G: Capture Display Area
Area H: Status Bar. It shows current display image info and loading progress.
Area I: Image Processing Area
① Open ASIDeepStack. Let’s start stacking with lights files, so click the “Light” tab in File List Area (Area B).
② Click the ”Select Light” button, then select the Light files that need to be stacked in the pop-up dialog.
③ The files will be imported after you choose. You can watch the progress bar at the lower right corner of Status Bar (Area H). When the importing is finished, “Load Completed” will be prompted.

The start stacking button in Stack Area (Area C) is now available. You can click the play icon to draw forth the stack window and then start stacking, but let’s just wait for a second.
④ If you need to re-select the Light files, you can click the sweep icon in the top right corner to remove all files under the current tab.
⑤ Import other calibration frames (darks, bias, flats).

⑥ When done importing all calibration frames, now you are free to start stacking. As mentioned in ③, a stacking window will pop up. After you complete stacking all files, it will automatically close and then show you the stacked image.


⑦ The main adjustment options in the “Image Processing” module are brightness, contrast and saturation. You can also stretch the upper “histogram” to further process the displayed image. When processing, if you think the result is over-processed, then you can click the “Reset” button to restart.
For beginners, we recommend you use “Auto”. For advanced astrophotography enthusiasts, you can adjust the brightness, contrast and saturation by yourselves. If the image still has much noise after processing, we recommend you check “Noise Reduction”. This would help.
When all work is done, don’t forget to save the image. The next step is about how to save it.

⑧ Click the setting button in Area A to set the file save path.
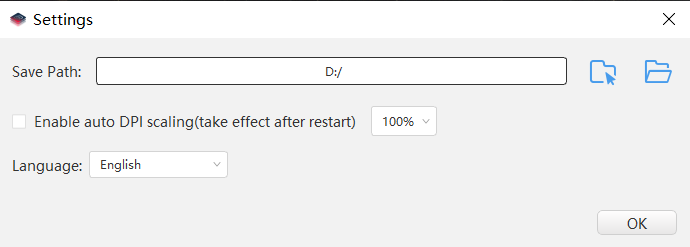
Click the save button in Area F to save. By default, jpg and FIT format files are saved in the set path.
The saved path will also be displayed in the lower left corner of the software.

Click the folder button in Area C to find the image file just saved.
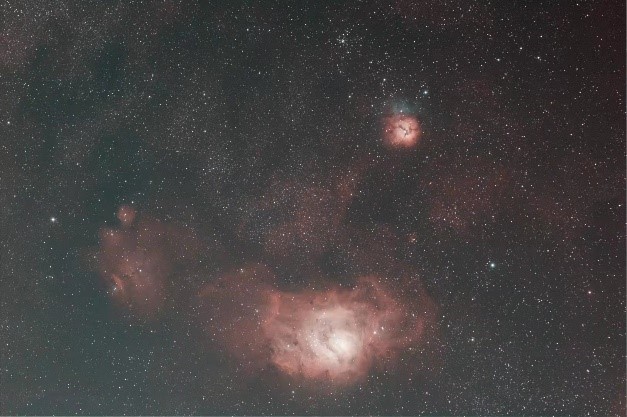
Here is the comparison before and after stacking:

Recently, a major discovery by an international team of amateur astronomers and scientists has become a huge online hit, and this new discovery is just located in one of the
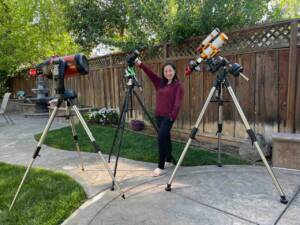
Tracy Cao is a 45-year-old stay-at-home mom based in Pleasanton, California, who discovered her passion for astrophotography in the summer of 2021. Although she is relatively new to the industry,
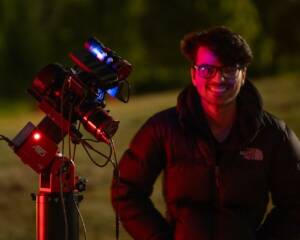
“My Name is Willie Stickley (@WillieHustles) and I am a 26 year old photographer and videographer from Cleveland, Ohio (United States) and I am the current Vice President of the
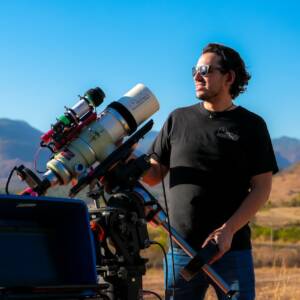
Guillermo Cervantes Mosqueda is an astrophotographer lives in Poncitlán, Jalisco, Mexico, whose fascination with the night sky began with astronomy books in his childhood. His journey officially took flight in
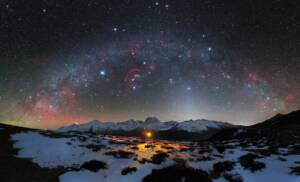
Being an astrophotographer is the most romantic job in the world. But behind that romance lies a canvas of isolation and peril.From standing helpless and alone at the Baima Snow
Peter Ambrose lives in Porirua, Wellington, New Zealand, after moving there from his hometown of Christchurch in 1991. Now retired from corporate life for over 13 years, he has been
17 Comments
Franco Broi
A couple of questions:
If I want to export the raw staked image, am I right in thinking that I have to press reset on the histogram? What about contrast and brightness, should I zero them also?
I’m new to astrophotography so have only just recently started stacking images but the initial results look surprisingly good. I took some dark frames with ASIAir and added them into the stack but they appeared to make no difference. Could this be because there is no noise in the Light frames? Looking at the darks I can see quite a bit of amp glow but I guess this is at a low level which is being amplified by viewer. The camera is ASI294MC-Pro.
Overall this is an easy application to use and produces good results – I think!
Cheers,
sara.liu
Image processing only saves to jpg file.
Fits file saves the raw data.
Оксана
When it comes to stacking; it does stack the files but there’s no options for any type of quality control. It just stacks what you put in, unlike DSS which registers each file first and you can choose the quality of the subs you want to use. There is a noise reduction tick box, but this is an automatic setting and I’m not sure what it does because there was still noise on the completed image, as well as satellite trails. My conclusion from trying it; Handy to have but I won’t be using it as a replacement for DSS in it’s current form.
sara.liu
We have all adopted the form of automation. Users can do stacking without selecting any parameters. As for the option of image quality control, in fact, it is also made in the software. Bad images will be automatically eliminated.
3plus2equals5
I can open deepstack and load light frames. When I hit the begin stacks arrow, it begins stacking and then the program closes abruptly at 33% complete. I am using the latest release. Also, Windows 10 is up to date with zero missing or corrupt files. What are the minimum hardware requirements? I.e. ram, processor speed, etc. what am I doing wrong. I really want this to work! Much invested in Zwo products. Than you! James
sara.liu
Please contact support@zwoptical.com directly.
Eric
Hello sir. I have the same problem . Did you get an answer from zwo ?
Jay
You say it only supports 16bit files. Does that mean it does not yet support lower bit files from 14bit cameras? This might affect my choice of new camera.
Memory Ji
No matter the bits of the camera itself is, it can be saved as a 16-bit file;)
Christian
I have the Problem, that bright stars are getting strange points and lines in the middle of them after stacking.
The single exposures ar looking fine.
The camera is a ASI2600MC-Pro.
Memory Ji
Please send a picture to our suppoort team: support@zwoptical.com. we need a further confirmation;-)
Martin
Can’t find a link or place where to download the software.
Please send me a link
Thank sounding advance
Martin
sara.liu
Please find the ASIDeepStack in the below link, the ASIDeepStack is included in the ASIStudio.
https://astronomy-imaging-camera.com/software-drivers
CJ
Is ASIDeepStack capable of stacking bin2 frames (e.g., RGB frames taken in bin2) to a bin1 (e.g., Lum frames) reference frame and perform upscaling like DeekSkyStacker?
sara.liu
No, it isn’t.
Bill
I am using an ASI533MC and ASIDeepStack 1.5.5 on a Mac. It works very well. The default for saving the stacked file is .jpg. But the size of the file is rather small (less than 1 MB) so I assume it is compressed (?). Can I change the format and amount of compression for the saved file? In particular, can I change the format to .tif?
Memory Ji
Hi Bill,
The .jpg file is for preview, you can also find the fits file at the same location (folder name is ASIDeepStack)