

Discovery of the M31 [OIII] emission arc
Recently, a major discovery by an international team of amateur astronomers and scientists has become a huge online hit, and this new discovery is just located in one of the
About half a year ago, we posted a tutorial on how to transfer images from ASIAIR, and proposed three solutions. As time goes by, the ASIAIR application has gone through many times of iterations. Also considering the comprehensive upgrade in the hardware of ASIAIR PRO, some of these 3 ways are no longer recommended now.
So here we re-write this tutorial. Hope it can help you guys a bit.
The first is the most recommended: Using an external storage device.
There is a 64GB USB memory stick in the package box of ASIAIR PRO. It will be auto-recognized when you plug it into ASIAIR PRO.

The USB flash disk coming with the package
Let’s go “Storage Settings” on the application. You can see clearly how much memory space you now have here.

ASIAIR – Storage Settings
Choose the SD card, hit “Image management”. As all images saved in the SD card are all listed here, it’s very easy for you to choose the target files.
(P.S. A new function called “Image Preview” was added in the version 1.4.2, which allows you to preview the saved images on ASIAIR application without using other software on the computer)

In “Image Management”, select the image files and copy to the USB memory stick. Then plug off the memory stick and connect it with the computer – I’m sure you know what to do next.
You can also move the image files or delete them in “Image Management”. It’s all your choice.
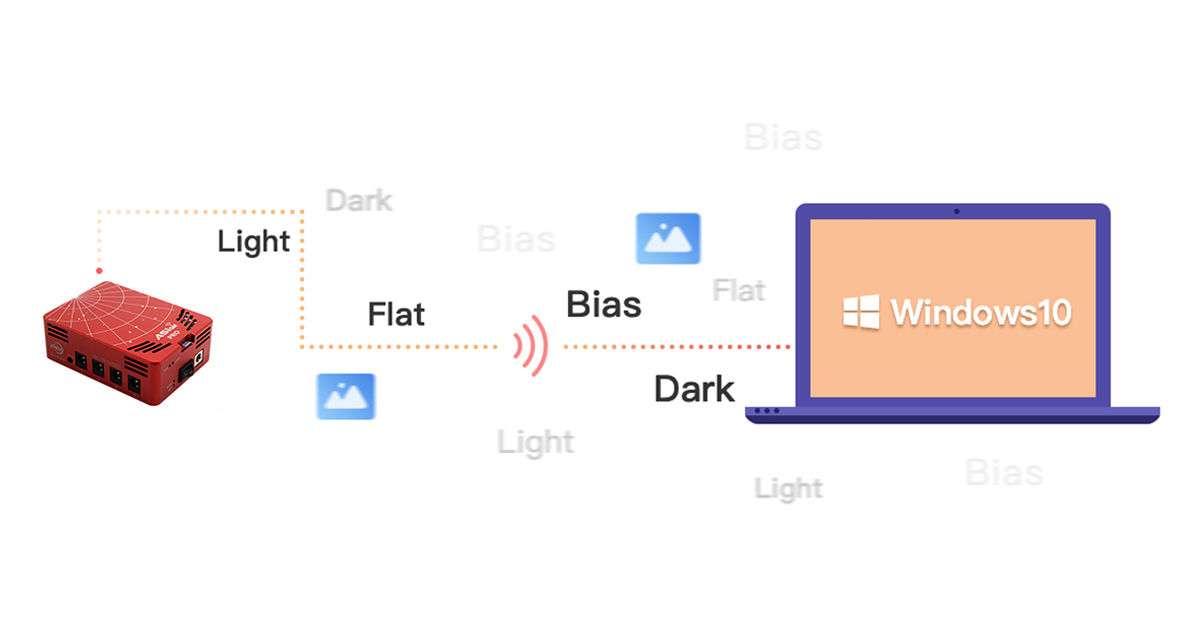
Connect ASIAIR to your WiFi router via WiFi Station Mode, press on the exclamation point to achieve the IP address.


WiFi Station Mode – IP Address
Open the File Manager on your computer, type the IP address you just achieved.
Done! You are free to visit the shared directory of ASIAIR now. Just copy the ones you like to your computer hard drives ^^

The shared directory
Only three points you might need to take care with:
1. For different operation systems, the ways to access the shared directory are different.
Windows: Type the IP address in the address bar of the File Manager.
MacOS: In the Finder on your Mac, choose Go > Connect to Server. Then type the network address.
2. Your computers should be equipped with wireless network cards. Same with Method 3 and Method 4.
3. You will find an ASIAIR shared directory which is set to read-only for security. You can only copy the files from this location to your computer. We advise you delete the files from ASIAIR application after you done transferring.
Connect your computer to the ASIAIR Wi-Fi network, open the computer File Manager and type \\10.0.0.1 in the address bar.
Then copy the read-only files like what you do in Method three.
This method is similar to using the Wi-Fi connection but this time utilizes the wired LAN connection.
Connect the ASIAIR to your network via a LAN cable port, check “Wired Ethernet” and access the IP address in the detailed page.
Open the computer File Manager and type the IP address in the address bar.


You may find the method two and method three quite similar at the first glance. However, they have quite distinct differences.
The WiFi Station Mode is made to greatly expand the transmission range of ASIAIR, which will benefit the remote operation for sure. You can leave your setup outside of the house and control them via ASIAIR application in anywhere of your house. Stay warm and transfer the image files in a very relaxing way! But it has one necessary precondition — You need to have the wireless LAN at your shooting place. It’s not a big deal when you are at home, but if you come into the wild, it can be a problem.
The ASIAIR WiFi network, in contrast, it does not need the wireless LAN to work but the signal transmission range is very limited.
As for Method four, the wired LAN connection, it aslo has its advantages and disadvantages. The advantage is its transmission speed is relatively fast compared with other methods. The disadvantage is it can be really troublesome and messy in your shooting place. You’ll have to use a long cable to connect the WiFi router to your ASIAIR PRO. So we do not recommend this method.
Thus, in conclusion, the most recommended method to transfer image files from ASIAIR is still using the external storage device.

Recently, a major discovery by an international team of amateur astronomers and scientists has become a huge online hit, and this new discovery is just located in one of the
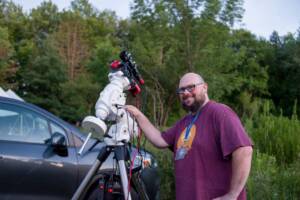
From Seestar to Pro: Dominik Popławski’s Journey into Deep-Sky Imagin Hello. My name is Dominik Popławski. I live in Poland. I’m a painter and computer graphic designer. Astronomy has been
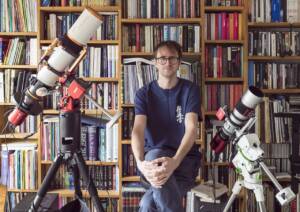
My name is Eric Wright and I’m a 39 year old Astro photographer and cybersecurity technician in the Cleveland, Ohio area (United States). I am the current Secretary for the
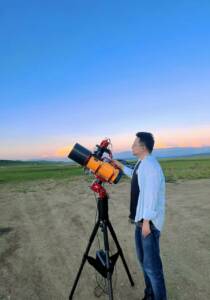
Some astrophotographers spend years searching for the perfect image. For Deqian Li, the journey began only in 2024—yet within a remarkably short time, several of his images have already been
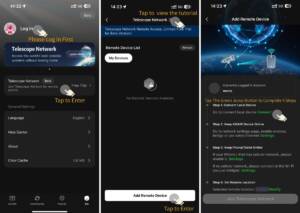
Part 1: What’s New in ASIAIR V3.0 New Features Optimized & Fixed Telescope Network is now live No matter where you are, as long as your device is online, you

How It All Began Meet Benoit De Mulder(@ bigbenuniverse) , 52, and started visual astronomy at the age of 8. “For as long as I can remember, I’ve been fascinated
35 Comments
Junseok
I am currently using asiair (not pro version). Does the model also recognize usb memory?
Moson
Yes,it can also recognize usb memory.
Stephan
Will it be also possible, in a future version, not only to copy the files?
Move would be also fine 😉
Katherine Tsai
Thank you for your feedback! Would you kindly provide more details on how to move the files?
Mario Spenard
Even if I delete my previous images from the USB memory stick, ASIAIRPRO is showing me that my 60gb stick is near full capacity.
What can I do? Should I format the USB stick?
thx.
ZWO.Moson
Yes, you can format the USB stick.
Mario
I use asi air pro. the wifi 5g disconnect offen at only 30 ft. Will an update could fix that soon?
I have a asi 120mm for giding and not supported by asi air pro will it be a update for that of do I have to sell it?
Same for my auto focus, Rigel autofocus?
I love the new asi air pro but so much to change in my setup! $$$
ZWO.Moson
1.You can use the Station Mode or connect it into ethernet.
2.Sorry the ASIAIR PRO does not support ASI12MM, nor the third part focuser.
There is the link for your reference: https://astronomy-imaging-camera.com/product/asiair-pro
Robert
OK, I know that I am missing something stupidly obvious with my ASI AirPro, but I cannot record images or videos to either the SD card or the thumb drive. Everything works great on the AirPro and I am able to view and manipulate images/videos on my iPhone, but after I am asked to save something, I get a progress bar indicating the video/image is being saved, but the images do not appear on either the SD card nor the thumb drive regardless of which one is designated.
Thanks for any help.
sara.liu
Hi Robert,
I think this post will be helpful to you:https://astronomy-imaging-camera.com/uncategorized/asiair-guide-3-ways-to-import-images-from-asiair.html
Robert
I think I solved the photo issue and I finally found the lost videos. However, what I am curious about is why the videos wind up in my iPhone iPhoto app? How is this possible when the iPhone is not among the choices for destination files. The only two choices I see are either the SD card or the thumb drive. So when I choose the thumb drive as the destination for videos/images, how do videos end up in the iPhoto app and how can I direct them to be saved where I want? Thanks.
sara.liu
If the video is MP4, it will be saved in the phone.
If the video is AVI, it will be saved in the default storage device.
Robert
Wow….good to know, but this is totally confusing, complicated and completely unnecessary.
Now we have the SD card, the thumb drive, and the iPhone as potential targets for saving files, and it is not obvious that the iPhone is a target at all.
Please fix this in a future release, and allow users the choice to save ALL files in the SAME location.
Thanks
Robin
Where/ how do you change the video file from mp4 to avi or back, so that the video can go to the thumb drive…default seems to be my iPad
Support@ZWO
Above the center “record” button.
Sam
If one forgot to put the flash drive in but had the flash drive chosen as the storage place for pictures to be stored, will they still save to SD card? Did this😳 but don’t have access to AirPro for a few days to check myself & I have four hours of data from last night!
Thank you.
Support@ZWO
Of course, there is no other place for saving.
Simon
When using my ZWO ASI 2600 mc pro with the ASIAIR PRO, All of the files saved are fitts and a duplicate jpg.
I want to turn off the jpg files and only have the fitts files saved. How to I turn off the jpg’s?
Thanks.
Simon
Support@ZWO
It can not be turned off.
Tim
Captured my first images with my AAP and 5133 camera. In order to access the FITS files on my MacBook (ver. 10.14.6 ) I have downloaded ASIStudio V1.4. When I try to install it I get “can’t be opened because Apple cannot check it for malicious software. This software needs to be updated. Contact the developer for more information”
Where do I go from here? I use Photoshop and Lightroom for processing and neither will recognize the PITS files.
Support@ZWO
Why your Mac consider ASIStudio as malicious software? You need to check your security setting of MacOS.
DaveJT
Hi Tim, just saw this. I believe the error you are getting is because the app is not from a known Apple ‘signed’ developer or something like that. The zwo download page shows a way to reduce the security settings on your Mac to install, however there is another way to install these unsigned apps, if you trust them, whiteout changing the system settings.
Instead of double clicking to launch, right click (or control click) on the app and choose ‘open’ from the contextual menu. You will be presented with a warning dialog, make the appropriate choice. After the initial install you should be able to launch with a double click.
@zwo. Why not get listed as an authorized developer with Apple? Not sure what is involved but it would give us an extra layer of security in this age of hacking.
sara.liu
The ASIStudio includes five kinds of software, it is a collection of 5 software. This kind of software collection is not recognized in the Apple Store and cannot be authorized by them.
Stephen
Hi. I’ve got an ASIAIR Pro and several cameras and a guide scope. Great products! I recently bent my 64GB USB Memory Stick that came with the ASIAIR Pro, and I would like to use another one. I noticed ZWO formatted the original one as FAT32. My laptop only lets me format in NTFS or exFAT. Is the exFAT format okay to format a new 64GB memory stick? Can I use a 128GB instead? Thanks for a great product!
sara.liu
The NTFS are exFAT is ok, you can use a 128GB instead.
Joshua Newman
I am trying to connect to the share using \\ but when I do, I get prompted for credentials. Is there a username and password I should be sending to the ASIAir Pro? it is currently on firmware 1.7 and I am using Windows 11.
sara.liu
Sorry, there isn’t.
This is a method of protecting the AIR files.
Peter Christensen
You can use the credentials from the ASIAIR WiFi Connection (ID = SSID/ASIAIR; Pass = 12345678).
/Peter
Richard
Yes, the SSID = username and Password = Passcode on the ASI Air sticker worked for me! I’m now able to transfer images which show up on the USB when plugged into ASI Air but aren’t visible when plugged into my computer.
alan.bruce
New update defaults to SD card on the pro every time you open the app…..why the change?
This means if you forget to change to USB thumb drive you have a to spend a significant amount of time transferring data from the SD card to the USB drive…..Backward step in my opinion….Not happy!
Memory Ji
Thanks for your suggestion. we will submit it to our Dev department.
Leo
I recently by mistake bent the 32GB SD card that came with the ASIAIR Pro. I bought another same size but when trying to copy OS image for ASIAIR Pro with Win32 DiskImager I’m getting not enough space. Why can I not get enough size to burn image as I’m using same 32gb SD size from original SD card that came with ASIAIR Pro.
sara.liu
Please kindly check your card’s size on disk whether is indeed 32 GB.
SFLmX5oM
Please update for more recent Window 11 version… Thankyou
sasa.wang@zwoastro.com
We will update as soon as possible. Thank you for your support!