

Discovery of the M31 [OIII] emission arc
Recently, a major discovery by an international team of amateur astronomers and scientists has become a huge online hit, and this new discovery is just located in one of the
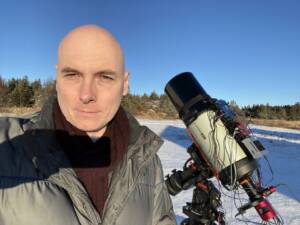
[This review was written by @davidparks (Cloudy Night) and we got the authorization to share it onto the ZWO website. We’d like to thank David for his great work and kindness very much!]

The vixen dovetail that comes with the ASIAIR Pro can be mounted on the side, or either horizontally or vertically on the bottom. With power input on one end, managed power outputs on the adjacent side, and USB ports on the opposite end, you have several orientations to choose from to accommodate your cable approach angles. Yes, I said “managed output”, to my surprise you can turn the 4 power outputs on/off individually in the ASIAIR App. I used 2 of the power outputs to power the cooler on my imaging camera, and directly power the dew strap on the C5, no controller needed.
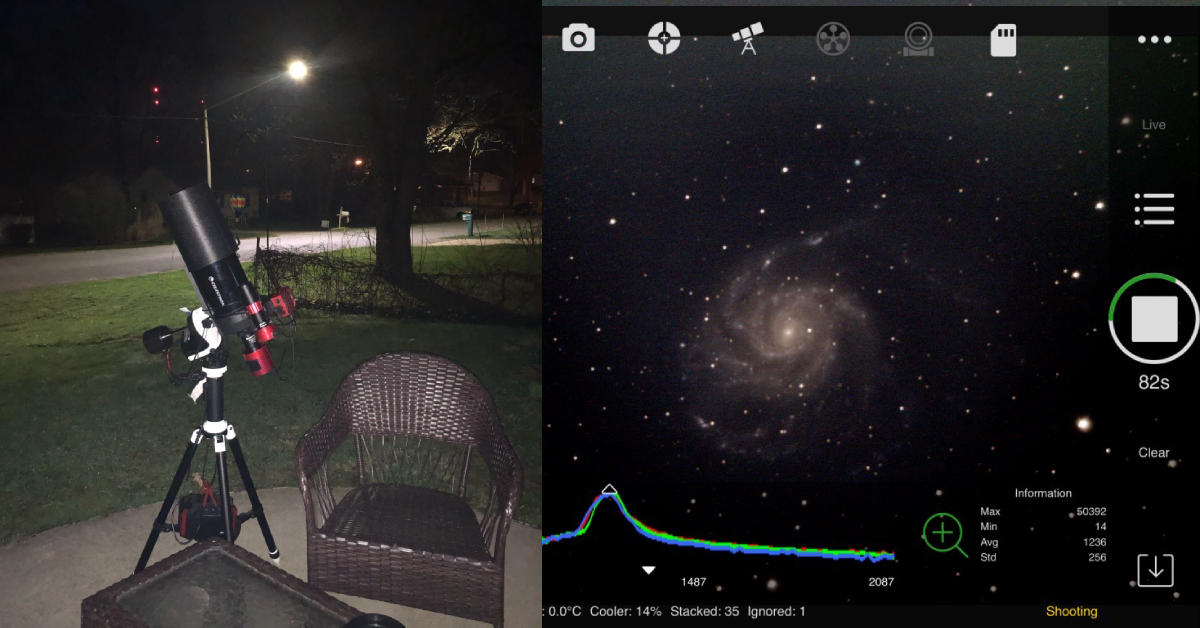
I secured the ASIAir Pro onto a dual dovetail along with a ZWO Mini Guide Scope (30mm/f4), attached to a Celestron C5 SCT (127mm/f10), mounted on a Skywatcher AZ-GTi. Although you can easily connect the ASIAIR Pro and AZ-GTi wirelessly, I used a Lynx Astro FTDI EQDIR USB cable to connect directly to one of the two USB2 ports on the ASIAIR Pro. The two USB3 ports of the ASIAIR Pro were connected to a ZWO ASI224MC and ZWO ASI294MC Pro. I use an Apple iPad Pro to run the ASIAIR App and connect wirelessly to the ASIAIR Pro with the 5Ghz band.

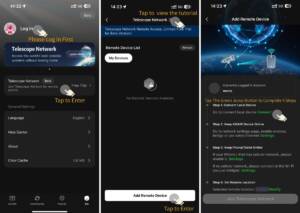
I use the AZ-GTi on an iOptron EQ Base in EQ Mode, so the first order of business was to achieve Polar Alignment using the PA Mode in the ASIAIR App. Once the mount and scope are set in the conventional “EQ Home” position, ASIAIR makes Polar Alignment as “easy as 1, 2, 3” by platesolving, rotating the mount 60 degrees, and platesolving again. ASIAIR’s platesolving is lightning fast, and provides continuous updates guiding your alignment knob adjustments. ASIAIR states that an alignment error up to 2’ is reasonable, and even though the EQ base I was using leaves A LOT to be desired for fine adjustments, I was able to secure alignment with a 13” error in about 5 minutes. I feel that ASIAIR’s claim that a 2’ error is reasonable is not only acceptable, but with my experience with guiding out a 6’ error with the original ASIAIR (on this same mount), completely justifiable.


The next step for me was to achieve good focus. ASIAIR’s Named Stars database allows you to choose a star, for which ASIAIR will automatically GoTo, platesolve, and center. With ASIAIR’s built in object databases and lightning fast platesolving (consistently less than 2 seconds), Star Alignments and planetarium programs are not needed. The ASIAIR Pro had Arcturus centered, the mount tracking and auto-guiding in moments. The Focus Aid of ASIAIR provides live HFD and other measurements to inform your focusing, however, I simply used a Bahtinov Mask and the zoom window of the Focus Aid to achieve focus. ASIAIR Pro supports ZWO’s EAF providing a very useable interface, but tonight I was just manually focusing with the standard rubber SCT focus knob. It became apparent that my C5 is in need of collimating, but that didn’t bother me too much, as my purpose was to evaluate the ASIAIR Pro, not to acquire my best images.


With a 97% illuminated Moon and Bortle 6 skies, I decided to just try the ASIAIR Pro’s Live Stacking, and forego any testing of the Sequencing usually associated with AP, which I’ve used before with the original ASIAIR. ASIAIR allows the calibration of your Live Stack with Flat, Dark, and BIAS masters. ASIAIR creates and saves these calibration masters by acquiring and stacking individual frames. Using the Preview Mode and a small LED Light Panel, I found a suitable exposure for my Flats. The Live Stacking dialog allows you to configure, acquire, and stack a number of exposures into calibration masters. Using the LED Panel and objective cap, I captured the flats, darks, and bias frames that stacked into their respective masters. Each master is saved as a single FITs file, which can then be selected and applied to your Live Stacking. While ‘on-the-fly’, or ‘as-needed’ flats and bias are generally not time consuming, I would encourage you to build a Dark Library on the ASIAIR Pro, as to save that precious time for Live Stacking. Since this was my first use, I only took the time needed to produce 5 two minute dark exposures to use with the 20 flat and 30 bias masters.
An additional word about the ASIAIR Pro and Calibration frames: The ‘Autorun’ or Sequencing Mode of ASIAIR allows for the capture and saving of all the individual calibration frames, for later post-processing. The Live Stacking Mode of ASIAIR captures and stacks calibration frames into a single saved Master, per type. Live Stacking Mode does not save the individual frames, only the masters. It can, however, save the individual Lights, during Live Stacking.


I chose M101 (The Pinwheel Galaxy) as my target thinking it would nicely fill the frame of the C5’s 1250mm focal length, while also be somewhat removed from the Moon and nearby offensive street lamp. As you will see in the images, this street lamp causes an unpleasant gradient unless I take further mitigating steps, which I did not for this simple evaluation. After choosing my target in the object database, ASIAIR quickly centered M101 and had the mount guiding. The ASIAIR Guiding Interface might best be described as a kind of ‘PHD2 Lite’. It’s very quick, easy, and effective. It can automatically or manually choose a guide star, automatically calibrate if needed, and begin guiding with or without dithering. You can also tweak some settings like DEC Mode and Aggressiveness, although I found this to be unnecessary and just allowed ASIAIR to automatically do it’s thing without any input from me.
Note: For those thinking they will get an ASI224 as an entry level planetary and small DSO camera, and later use it for a guide cam when they upgrade to a larger imager, I assure that the ASI224 performs just fine when coupled with a suitable guide scope.


With calibration masters applied, target centered, and mount guiding, I began to Stack 2 minute exposures. The ASIAIR provides an Auto-Stretch, but I quickly found the manual stretch controls on the Histogram Display and was better able to compensate for Bortle 6, street lamp, and Moon.
In all, the ASIAIR Pro provides a very comfortable experience, and effective data acquisition, somewhere in-between being ‘totally manual’ and ‘totally automated’. A very nice balance between fiddle/tweak and fire-and-forget. The ASIAIR Pro easily lends itself to the needs of the backyard, dark field, or out-reach experience yielding quality data for long integrations, or immediate live stack viewing.


More


The original post link: https://www.cloudynights.com/topic/701071-live-stacking-with-the-asiair-pro/
Recently, a major discovery by an international team of amateur astronomers and scientists has become a huge online hit, and this new discovery is just located in one of the
From Seestar to Pro: Dominik Popławski’s Journey into Deep-Sky Imagin Hello. My name is Dominik Popławski. I live in Poland. I’m a painter and computer graphic designer. Astronomy has been
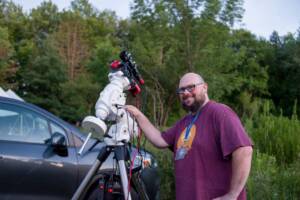
My name is Eric Wright and I’m a 39 year old Astro photographer and cybersecurity technician in the Cleveland, Ohio area (United States). I am the current Secretary for the
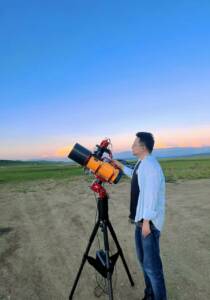
Some astrophotographers spend years searching for the perfect image. For Deqian Li, the journey began only in 2024—yet within a remarkably short time, several of his images have already been
Part 1: What’s New in ASIAIR V3.0 New Features Optimized & Fixed Telescope Network is now live No matter where you are, as long as your device is online, you
How It All Began Meet Benoit De Mulder(@ bigbenuniverse) , 52, and started visual astronomy at the age of 8. “For as long as I can remember, I’ve been fascinated
12 Comments
Adrian
Very well written and informative for a newbie like me using the ASIAir pro to get around the constant problems I’ve always experienced with polar alignment.
Trying to figure out all the settings and applying logic is a pretty steep learning curve and the information here is invaluable.
Thanks for making this available.
ZWO.Moson
Thanks for supporting us!
Piotr
Hi David,
Did you use any extender or a reducer?
If yes what kind?
How far was a camera sensor from a metal back of your C5?
Thanks,
Piotr
Alan Herning
Great article about Live Stacking. I used mine for the first time last night and was extremely pleased with it. One question I have is that I wasn’t able to stack in colour only greyscale. Obviously there is a setting for this operation but I can’t find it. Could you please advise me on this problem.Many thanks in advance.
Support@ZWO
If your camera is mono, you are not able to stack in color.
Paul Adams
very difficult to follow for the beginner.
Paul Adams
Re-reading 5 months later I find the article much clearer, and well-written and helpful. Of course the facts that I now have an equatorial mount and a camera with a much wider FOV helps enormously. But I’m still somewhat struggling with LiveStacking: I find it makes very little difference. Stacking 1 or 100 look very similar! The images in this article for 8 stacks or 34 are also very similar, the main difference is the latter have a darker background. A similar effect would be achieved simply by re-setting the black point. Maybe my calibration frames are not accurate enough?
sara.liu
Please try to increase the SNR; )
Ed
Your Article is the best I’ve seen yet, What I’m I Missing
I’ve had Asiair Pro for months now. Good skies are hard to come by. While I tried to follow your article, all I did was to save images when I thought I was Stacking.
Tracking, guiding, dithering, all indications I’m doing it correctly.
While I’m new to Astrophotography, Live Stacking still eludes me. What Important part of the process am I missing? Is there a switch or a step I’m missing?
Regards,
Ed
Vigo
Hey 🙂 When I do the live stack. Are the pictures saved normally like I do photographing without live stack?
sara.liu
Yes, you can enable the ‘Save Every Frame when stacking’ function which is in the light field.
Chris Martin
Great article. Love the fact that dew straps can be plugged into the pro. Now I don’t have to drag my power tank around. Thnx for the pics and writing this informative article..