

How to connect ASI6200MM Pro to 2″ EFW/M54 filter drawer and OAG-L?
How many solutions are there for ASI6200MM Pro to get 55mm back focus length?
If you are still stressed with these problems, then this tutorial is exactly what you are looking for.
There are five connection solutions for ASI6200MM Pro.
1. Using adapters only

*This solution needs the M48-M48 16.5mm extender and the M54-M48 21mm extender. You can find them in the package of the ASI6200 camera.
*5mm sensor tilt adapter is attached to the camera.
2. Using 2” EFW

*This solution needs M48-M48 16.5mm extender and the M54-M48-2 adapter (come with the 2” EFW). You can also buy the M54-M48-2 adapter separately.
*You need to disassemble the back cover of the 2” EFW and then fix it to the camera via the screws.
*5mm sensor tilt adapter is attached to the camera.
3. Using M54 filter drawer

*5mm sensor tilt adapter is attached to the camera.
It is much easier to connect to M54 filter drawer than to the 2” EFW with the M54* 0.75 male thread of the filter drawer, as the picture shows below:

Please note that the back focal length of the solution 2 and 3 is 56mm, and the M48-M42 adapter will block the sensor for a little bit as the diagonal of the ASI6200 sensor is already 43mm.
Thus, we more recommend you go solution 4 and 5.
4. Using M68 OAG and M54 filter drawer

*This solution only suits the telescopes with M68 thread side.
*5mm sensor tilt adapter is attached to the camera.
The detailed connecting instruction:
1) Preparation: M68 OAG, M54 filter drawer, ASI6200, and hexagon wrench.

2) Screw off the M54-M48-2 adapter from the filter drawer.

3) Mount the M54 filter drawer on the camera via threads.

4) Connect the M68 OAG to M54 filter drawer via the 4 screws. Please notice that you should keep the prism of the OAG parallel with the sensor of the camera.

5) Done.

5. Using OAG-L and 2” EFW

*5mm sensor tilt adapter is REMOVED from the camera.
This is the very first and also the most recommended connection solution. The combination of the mono full-frame camera and 2” filter wheel can create many possibilities for your astrophotos. The use of OAG-L will also help simplify your imaging setup by replacing the guide scope. It’s very suitable for skilled astrophotographers.
The installation of the OAG-L, 2” EFW and ASI6200 camera is not very complex, but considering you need to remove the sensor tilt adapter of the camera first, so we’d like here to teach the detailed connection steps to help you quickly complete the installation without making mistakes.
The detailed guide of the fifth connection solution:
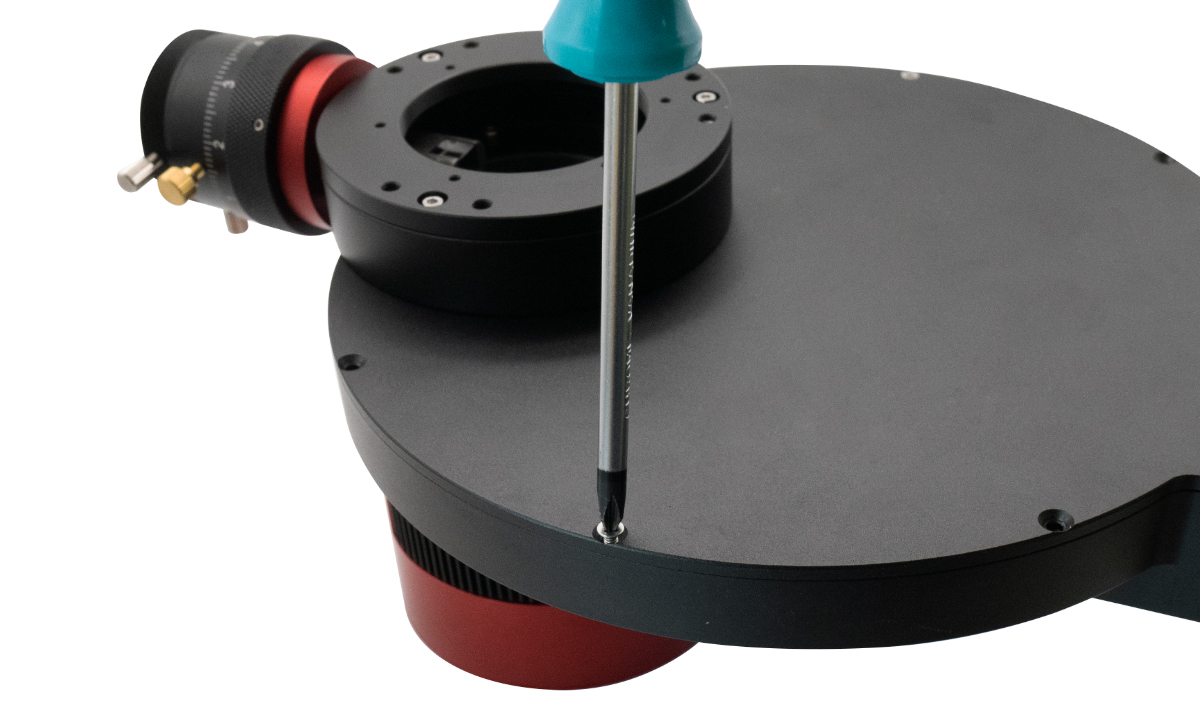
1) Disassemble the 5mm sensor tilt adapter on the main camera with the help of a screwdriver:

2) Remove the back cover of EFW:

3) Disassemble the filter wheel carousel (Note: Please do not disassemble or move the central screw of this carousel, otherwise the EFW will be damaged):
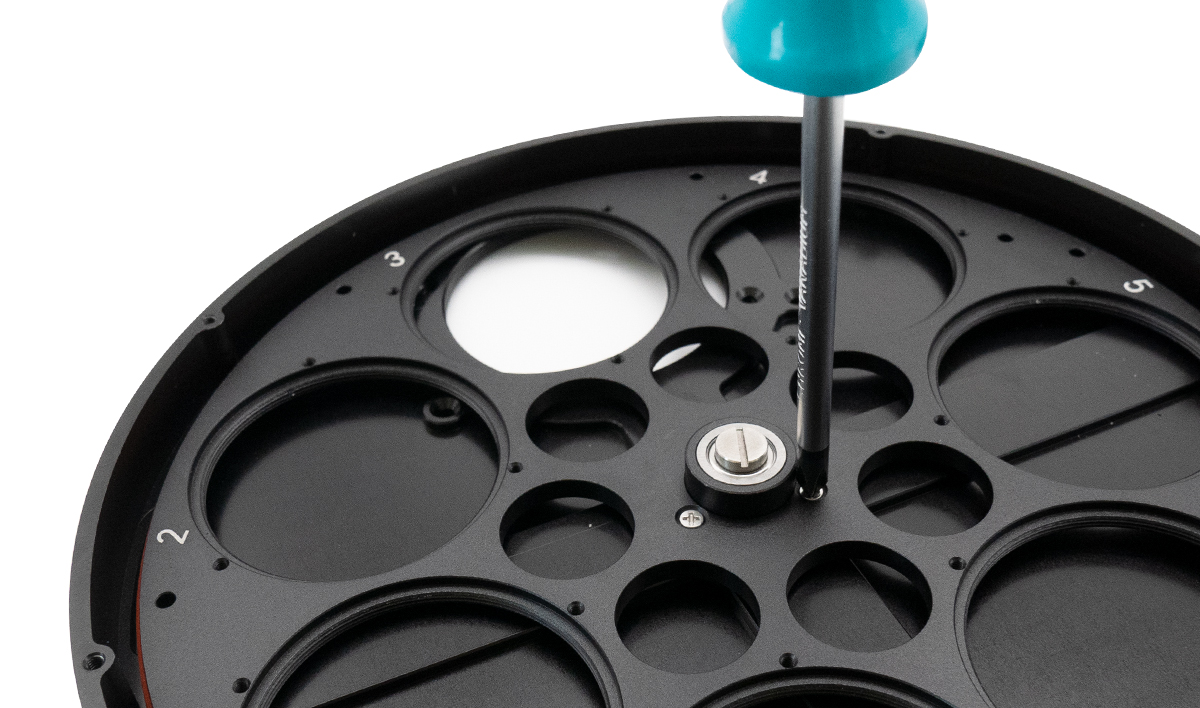
4) Align the four screw holes of EFW with these in the four corners of the camera chip as shown below:

5) Tighten the screws at the interface between the EFW and the main camera:

6) Install the filter wheel carousel:

7) Fix the OAG-L to the back cover of EFW
Note: You may reposition the prism to make sure it would not block the sensor.
The M2.5*8 screws used here can be found in the package of OAG-L.

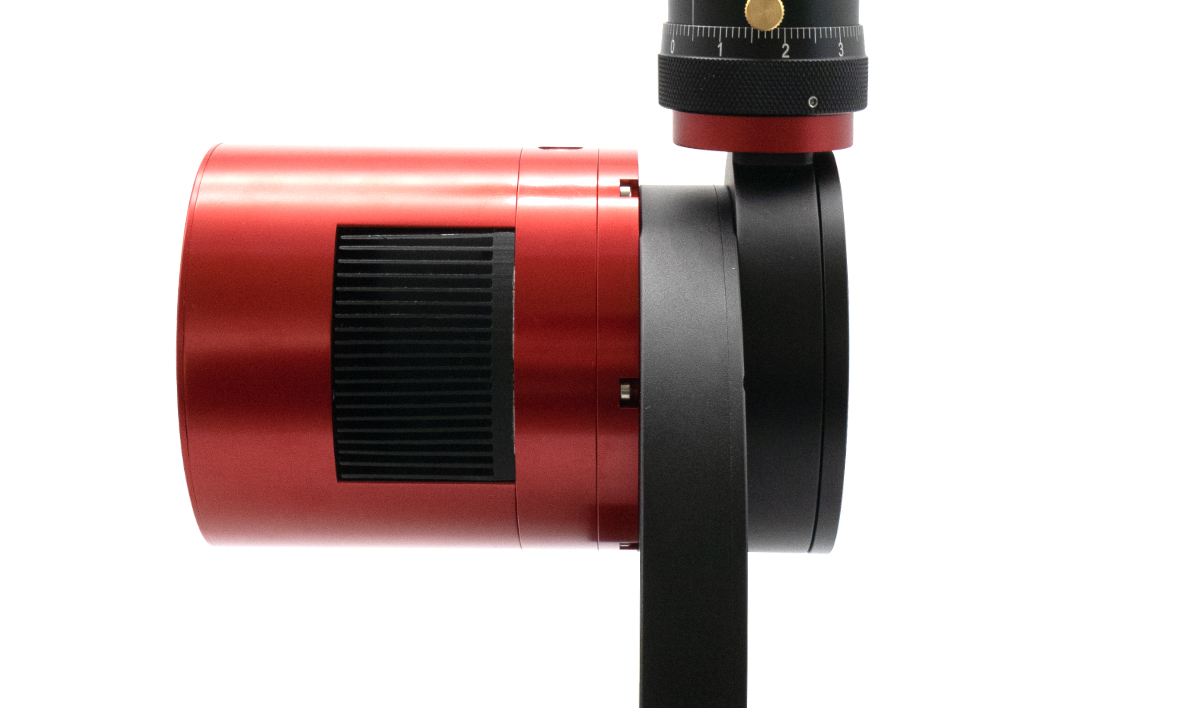
8) Fix the 5mm sensor tilt adapter to OAG-L.

9) Attach the back cover of EFW to the front cover:
10) Installation completed.
Note:
*In all solutions, the producing motor side of the EFW(the side where the ZWO logo lies) attaches to the camera.
*Please make sure the prism does not block the sensor or your telescope.
*Adjust the focal length of a guide camera by using the guide knob.
*It would be better if you finish the above steps during daytime, as it is very difficult to adjust it accurately at night.